The launch of the new Destiny 2 expansion, Nightfall, adds a new subclass – Strand – and restructures the mod system that affects player stats gained from armor. I’m happy to report that it only took me a couple of hours to revise my Shiny tool to find optimal armor loadouts using the new mods and subclass fragments! I had to hunt a little through some old code, and next time it should be a simple and easy update due to having fixed how I work with the manifest.
sed -i 's/^ \- r$/ \- rstats/' *.mdsed -i 's/^ \- R$/ \- rstats/' *.md
Somewhere along the way I ended up with two versions of my tag for R-related posts (#r and #R), and Hugo didn’t handle the lowercase one. A couple of quick sed lines did the trick to convert both to a more friendly version that Hugo handles just fine. I’m saving them here for future reference in case I ever want to bulk-change a Hugo tag again:
I’ve had a really nice hobby R coding weekend, learning to use {gganimate} to make plots like this. I’ve been re-tooling all my old piles of fish scripts that I’ve used to gather my Destiny data from the game’s API. Now I have a useful pair of quarto notebooks that retrieve data using parallel processing and produce this kind of output. I’m super enthused by what I’ve learned!
I learned today that one of the magical things pandoc can do under the hood for Quarto is use a Powerpoint template to render slides. I can work in RStudio to make slides in my company’s style; this is amazing!
(Footnote: This assumes a template that uses at least some standard powerpoint slide notation, which my company’s official templates do … not quite do. But a little bit of revision of the slide master got me there!)
I’m really taken by this line in Paul Ford’s newest essay at Wired:
What I’m going to work on, for the rest of my career in the tech industry, hand to God (OK, I’m an atheist and easily distracted, so caveat lector), is making nice little tutorials and tools—better sticks for kinder monkeys.
“better sticks for kinder monkeys” is such an admirable, and needed, call to center empathy and humanity in what we make.
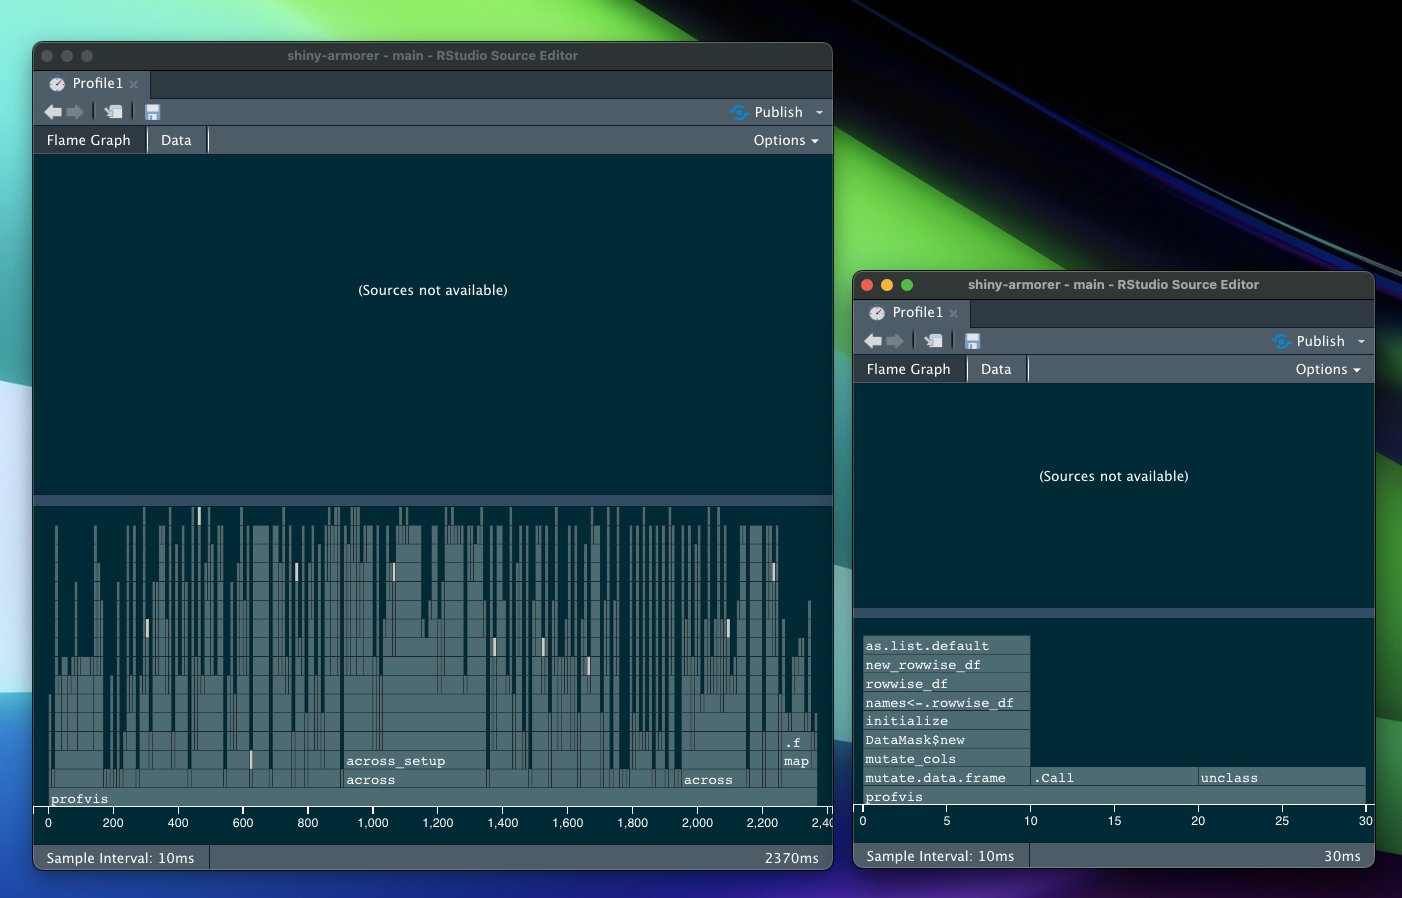
I used the RStudio tool profvis this weekend to find speed improvement opportunities in Armorer. I suspected that I could rewrite a big operation that calculates the maximum of many columns across several thousand rows. Holy smokes: Using matrixStats::rowMaxs cuts processing time by an amazing amount!
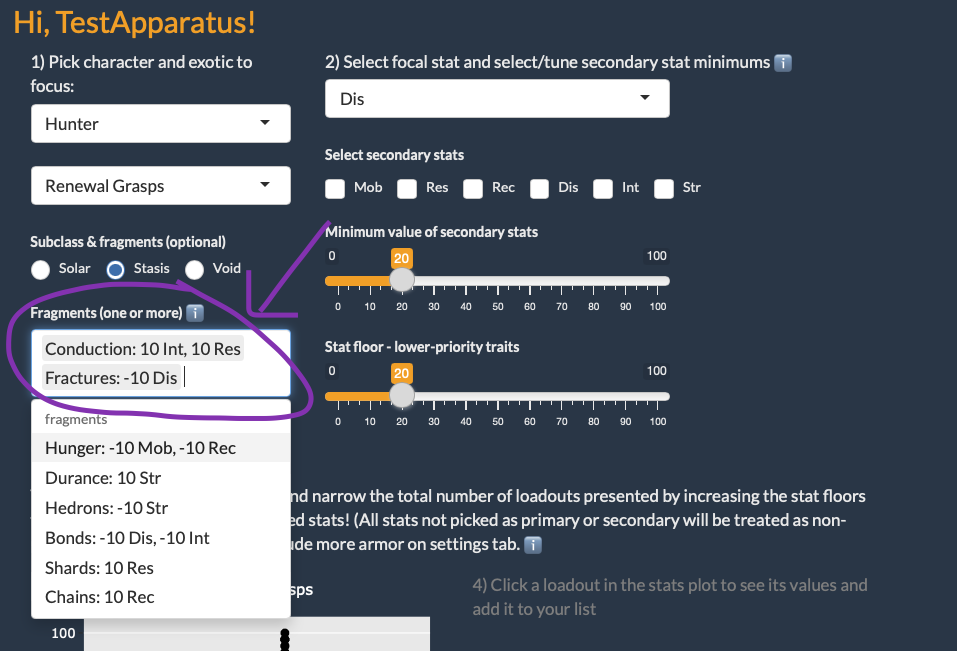
I finished a big update to Armorer this week, to enable inclusion of subclass fragments in stat calculations. I learned a ton with this release and laid good groundwork for additional mod management. I’m pretty pleased!