Today I made improvements to some R code in my Destiny 2 hobby-coding-verse after learning how to much more cleanly deal with nested lists. I had previously used a solution using map() to apply a selector to each item in the list, but this was clunky, hard to remember, and became really hard to read with several levels of a nested list.
The far better solution is the unnest_auto function from {tidyr}, which I came upon when tinkering with the last.fm API data recently. Once I understood how it works, it’s so easy and satisfying! The key is to first make a named tibble.
> tibble(my_tibble = instanced)
# A tibble: 906 × 1
   my_tibble
   <named list>
 1 <named list [10]>
 2 <named list [10]>
 3 <named list [10]>
 4 <named list [10]>
 5 <named list [12]>
 6 <named list [10]>
 7 <named list [10]>
 8 <named list [10]>
 9 <named list [9]>
10 <named list [9]>
# … with 896 more rows
That nice tibble can be operated on by unnest_auto():
> tibble(my_tibble = instanced) %>% unnest_auto(my_tibble) %>%
select(itemLevel, breakerType)
Using `unnest_wider(my_tibble)`; elements have 8 names in common
# A tibble: 906 × 2
   itemLevel breakerType
       <int>       <int>
 1       132          NA
 2       133          NA
 3       133          NA
 4       132          NA
 5       133           3
 6       132          NA
 7       133          NA
 8       133          NA
 9         0          NA
10         0          NA
# … with 896 more rows
(I selected just a couple of columns for readability there; if you don’t do that, you’ll receive all fields at the current list level, including additional nested lists if they exist). After figuring this out, I realized that I also needed to keep the names of each list element, because they constitute a unique ID for the element returned from the API query, and I banged my head a bit on trying to do that as a part of the unnest operation, before I backed up, recentered on the outcome I wanted to produce, and realized I could do it really cleanly using mutate()! The final code looks like this:
> tibble(my_tibble = instanced) %>% unnest_auto(my_tibble) %>%
select(itemLevel, breakerType) %>% mutate(id = names(instanced))
Using `unnest_wider(my_tibble)`; elements have 8 names in common
# A tibble: 906 × 3
   itemLevel breakerType id
       <int>       <int> <chr>
 1       132          NA 6917529338105913753
 2       133          NA 6917529550016812142
 3       133          NA 6917529281178546429
 4       132          NA 6917529231127188610
 5       133           3 6917529301504642848
 6       132          NA 6917529234625200021
 7       133          NA 6917529193313832065
 8       133          NA 6917529182955737017
 9         0          NA 6917529417667489181
10         0          NA 6917529490520758715
# … with 896 more rows
The D2 API returns a ton of nested lists, so this simplified, accessible and effective tool is 100% getting a featured spot in my toolbox.
Recent chat around micro.blog about enabling an “on this day” plugin prompted me to put together the shortcode below. Unlike sophisticated hugo configurations, mine is just updated by a cron job, so I can render it statically, without any javascript, and it’s always current to the day, even if I haven’t posted that day.
I call this shortcode from my /now page:
Posts on this day ({{ now.Format "Jan 2" }}):
<ul>
{{ range (where .Site.RegularPages "Section" "in" (slice "post" "note")) }}
  {{ if eq .Date.YearDay now.YearDay}}
  <li><a href="{{ .Permalink }}">{{ .Date.Format "2006-01-02"}} / {{ .Title }}</a>
  {{end}}
{{ else }}
    <li>... no entries ...
{{ end }}
</ul>Hugo: render hooks and partial for displaying images
Markdown render hooks allow for adding customization to the default markdown to html rendering in hugo. When placed in _default/_markup/render-image.html, this example overrides the standard rendering of images from markdown to include a call to Glightbox.
    <a href="{{ .Destination | safeURL }}" class="glightbox" data-gallery="{{ .Page.Permalink }}">
    <img src="{{ .Destination | safeURL }}" alt="{{ .Text }}" style="max-height: 720px" />
    </a>
This grabs the page’s permalink for the data-gallery property.
For photos specified in a post’s yaml frontmatter, I call a partial in my article template, photos.html:
    {{ range .Params.photo }}
    <a href="{{ replace .value " " "" }}" class="glightbox"
            data-gallery="{{ replace .value " " "" }}">
    <img src="{{ replace .value " " "" }}" alt="{{ .alt }} "
    style="max-height: 720px;"  />
    </a>
    {{ end }}
Both of these assign the data-gallery property in order to avoid overlapping galleries on index or other pages with multiple posts. One future improvement to try is building a shortcode to replace the partial, so that the gallery ID or other properties can be customized at call time.
SourceCodeSyntaxHighlight is a great drop-in plugin to enable syntax highlighting in the MaxOS finder’s quick view. Just what I needed to improve the experience of scanning json files in the finder!
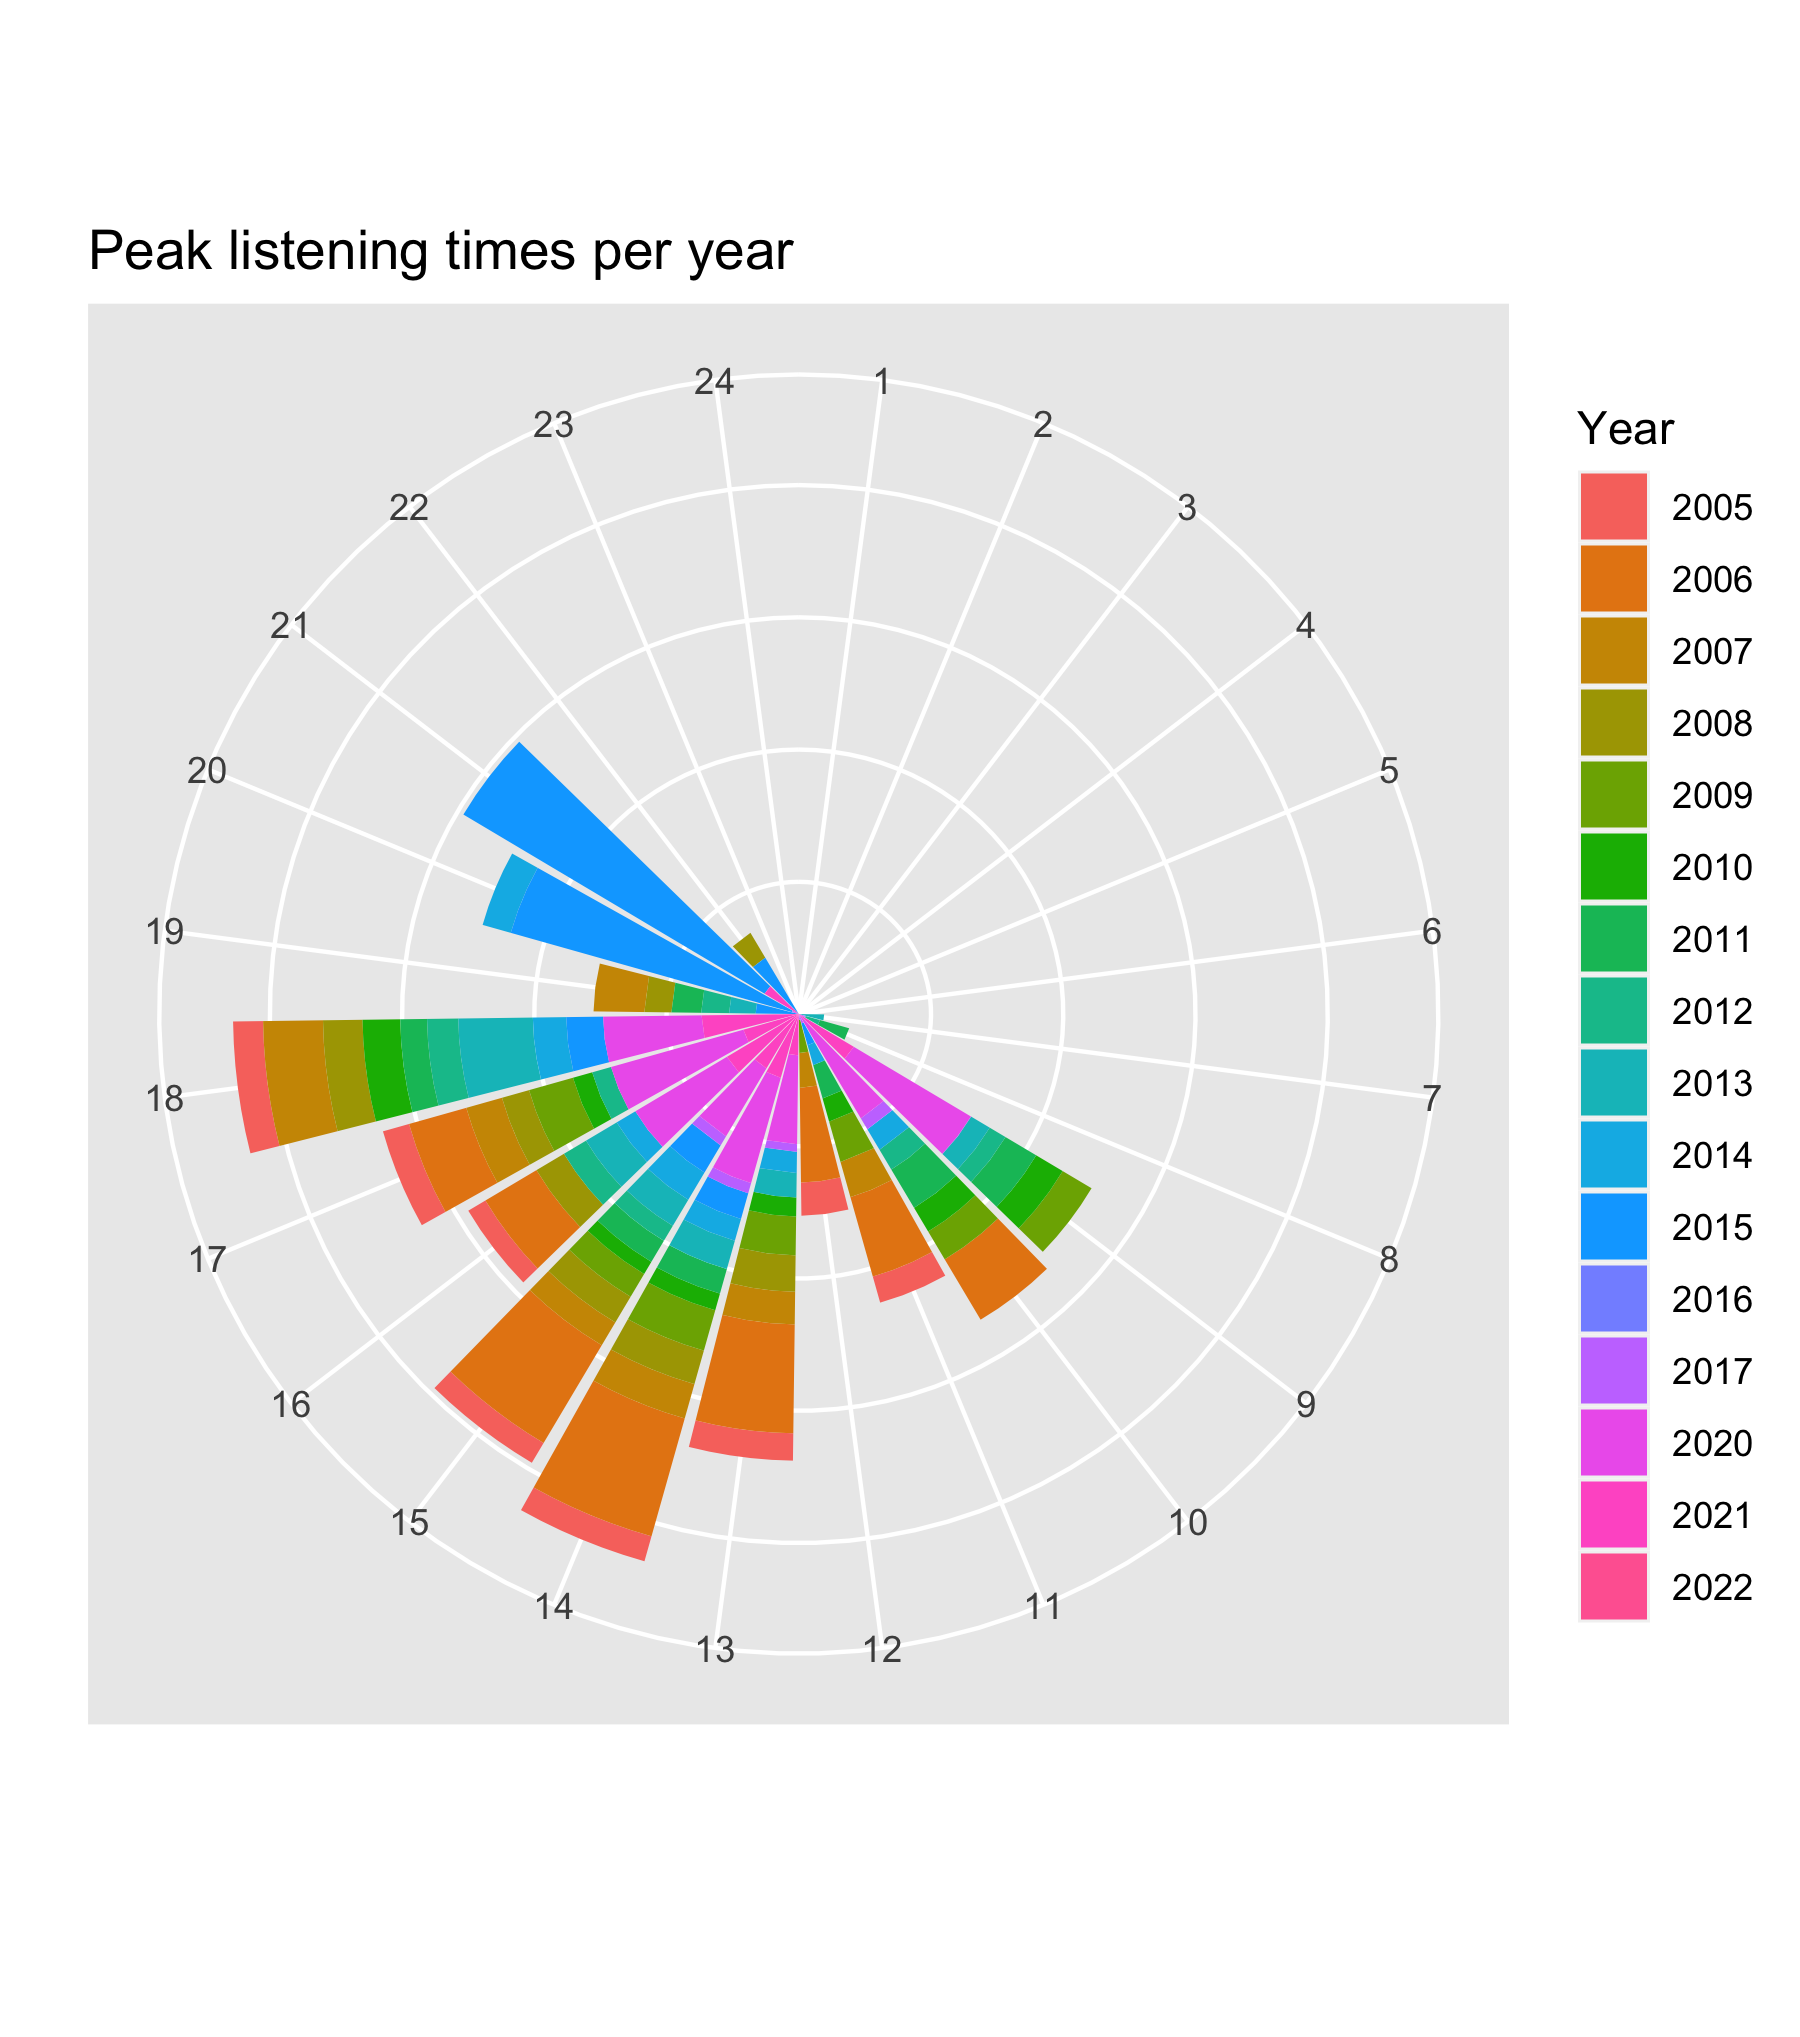
Today’s experiment with my last.fm data is this clock-like display of my peak listening hours across time. All of these would be really fun to integrate into more Shiny-based toys – maybe that will be next on my list.
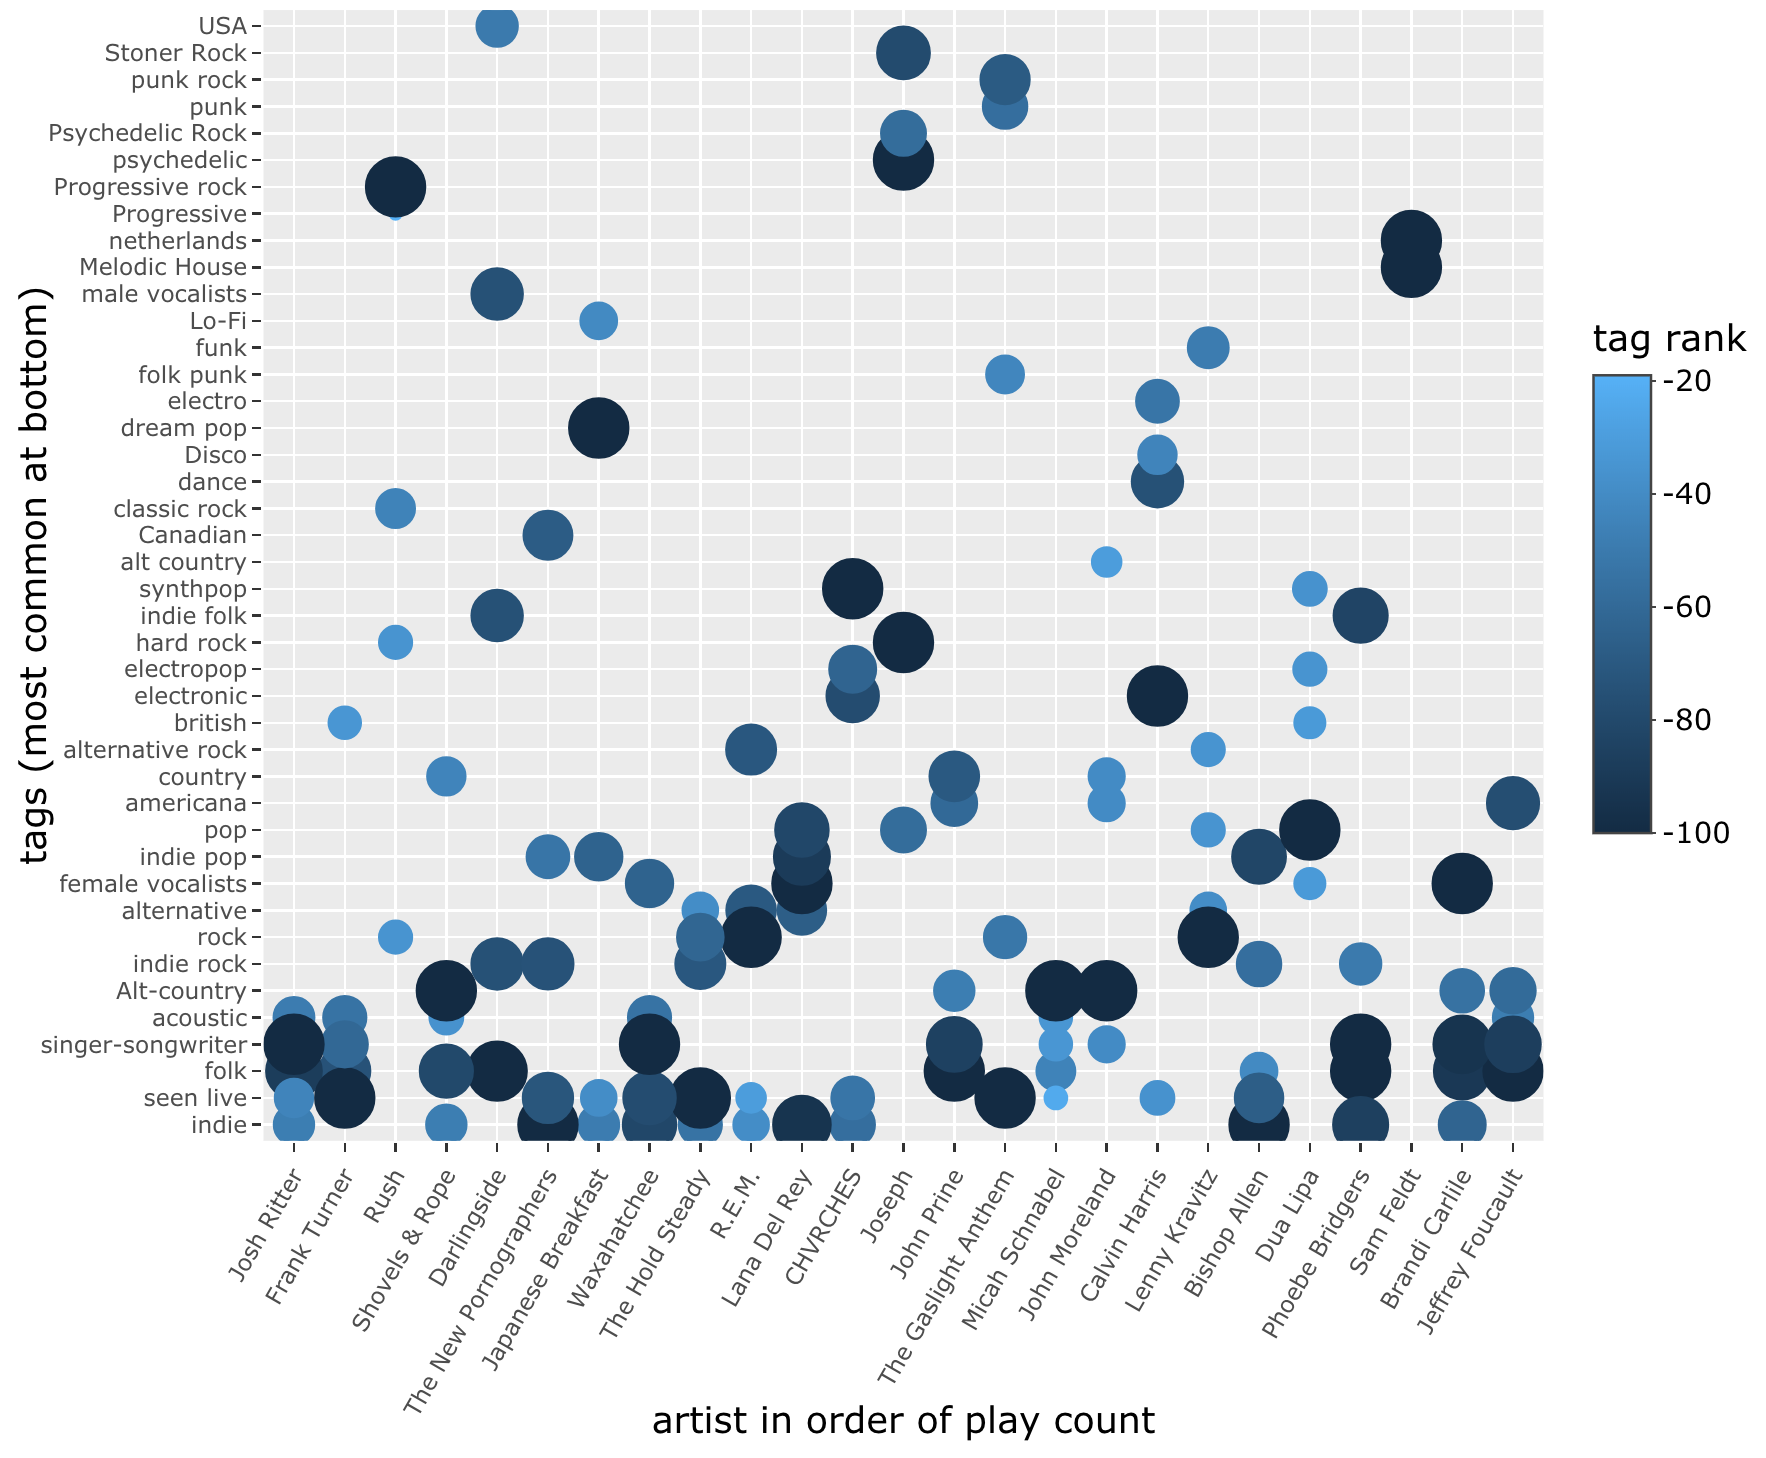
Okay, one final (probably) revision of tuneR for today, adding a bit of color and sizing to the plot of tags by artist, to show variation in tag rank within each artist.